Setup Streaming Destination
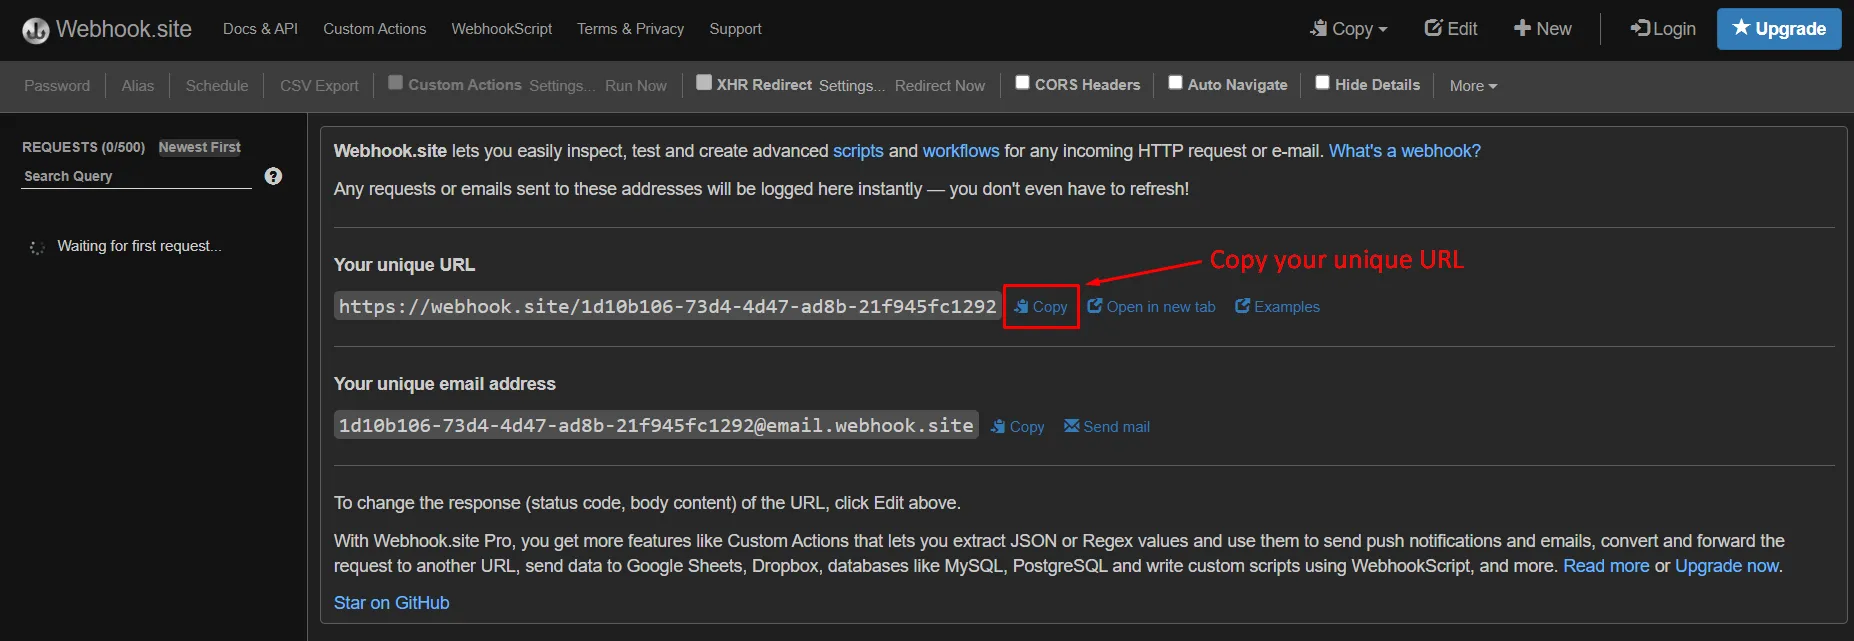
Get Webhook URL
We are going to use a webhook here so we can see if the data has arrived at the Destination we are sending to. In a real world scenario, we would log into that destination instead and use their tools to see what has arrived.
- Copy the unique URL you see and save it somewhere safe
Configure HTTP API Destination
We are using a Streaming Destination as a proxy for sending this data to a 3rd party (e.g. Facebook). In a real world scenario, you would use a Facebook Destination in place of an HTTP API Destination to send data to Facebook.
In the Experience Platform UI navigate to the destinations catalog by doing the following
- Click on Destinations in the left rail
- Click on Catalog on the top rail
- In the search box enter http
- Click on the Set up button to configure the HTTP API destination
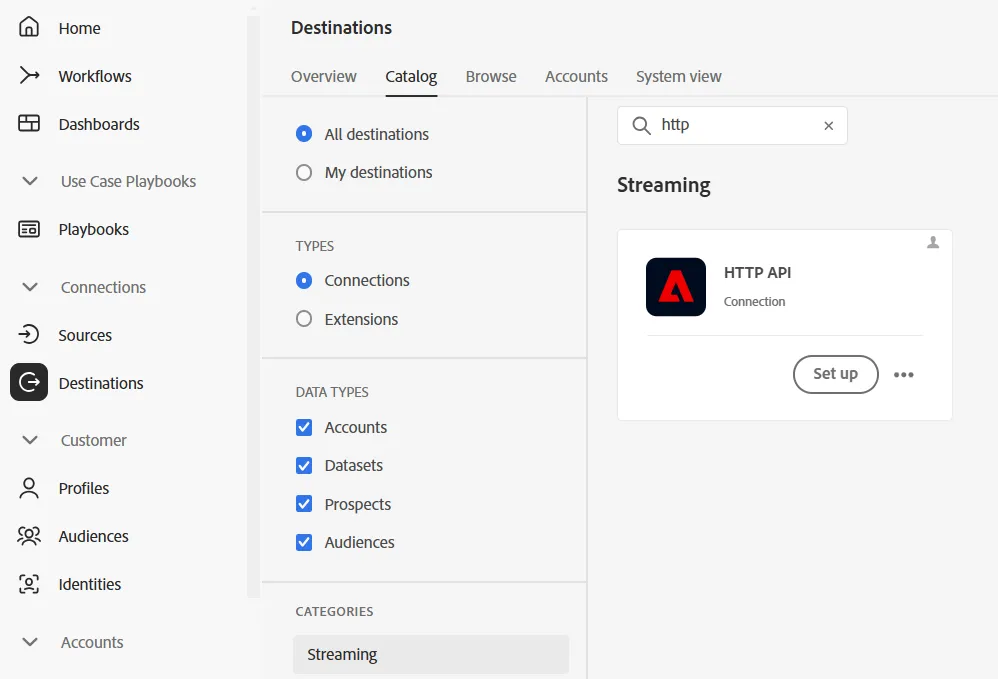
You are using the HTTP API streaming destination for the lab(s) to demonstrate how a real world streaming connector would work.
Configure
- Connection type None
- Click on Connect to destination
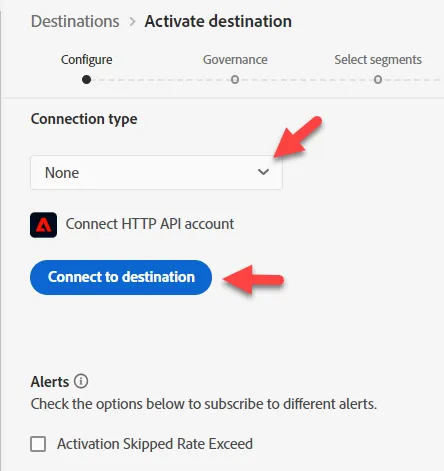
Typically we would add any authentication credentials at this stage, but none are required for this webhook.
3. Fill in the configuration details of your destination as follows:
- Name -> Streaming DEP Webhook - [Your Initials]
- Description -> [your webhook url/endpoint you copied above]
- Endpoint -> [your webhook url/endpoint you copied above]
- Query Parameters -> leave blank
- Headers -> leave blank
- Include segment names -> toggle on
- Include segment timestamps -> toggle on
When done ensure your configure matches what you see below. If it looks good click the Next button in the upper right to continue to the next step
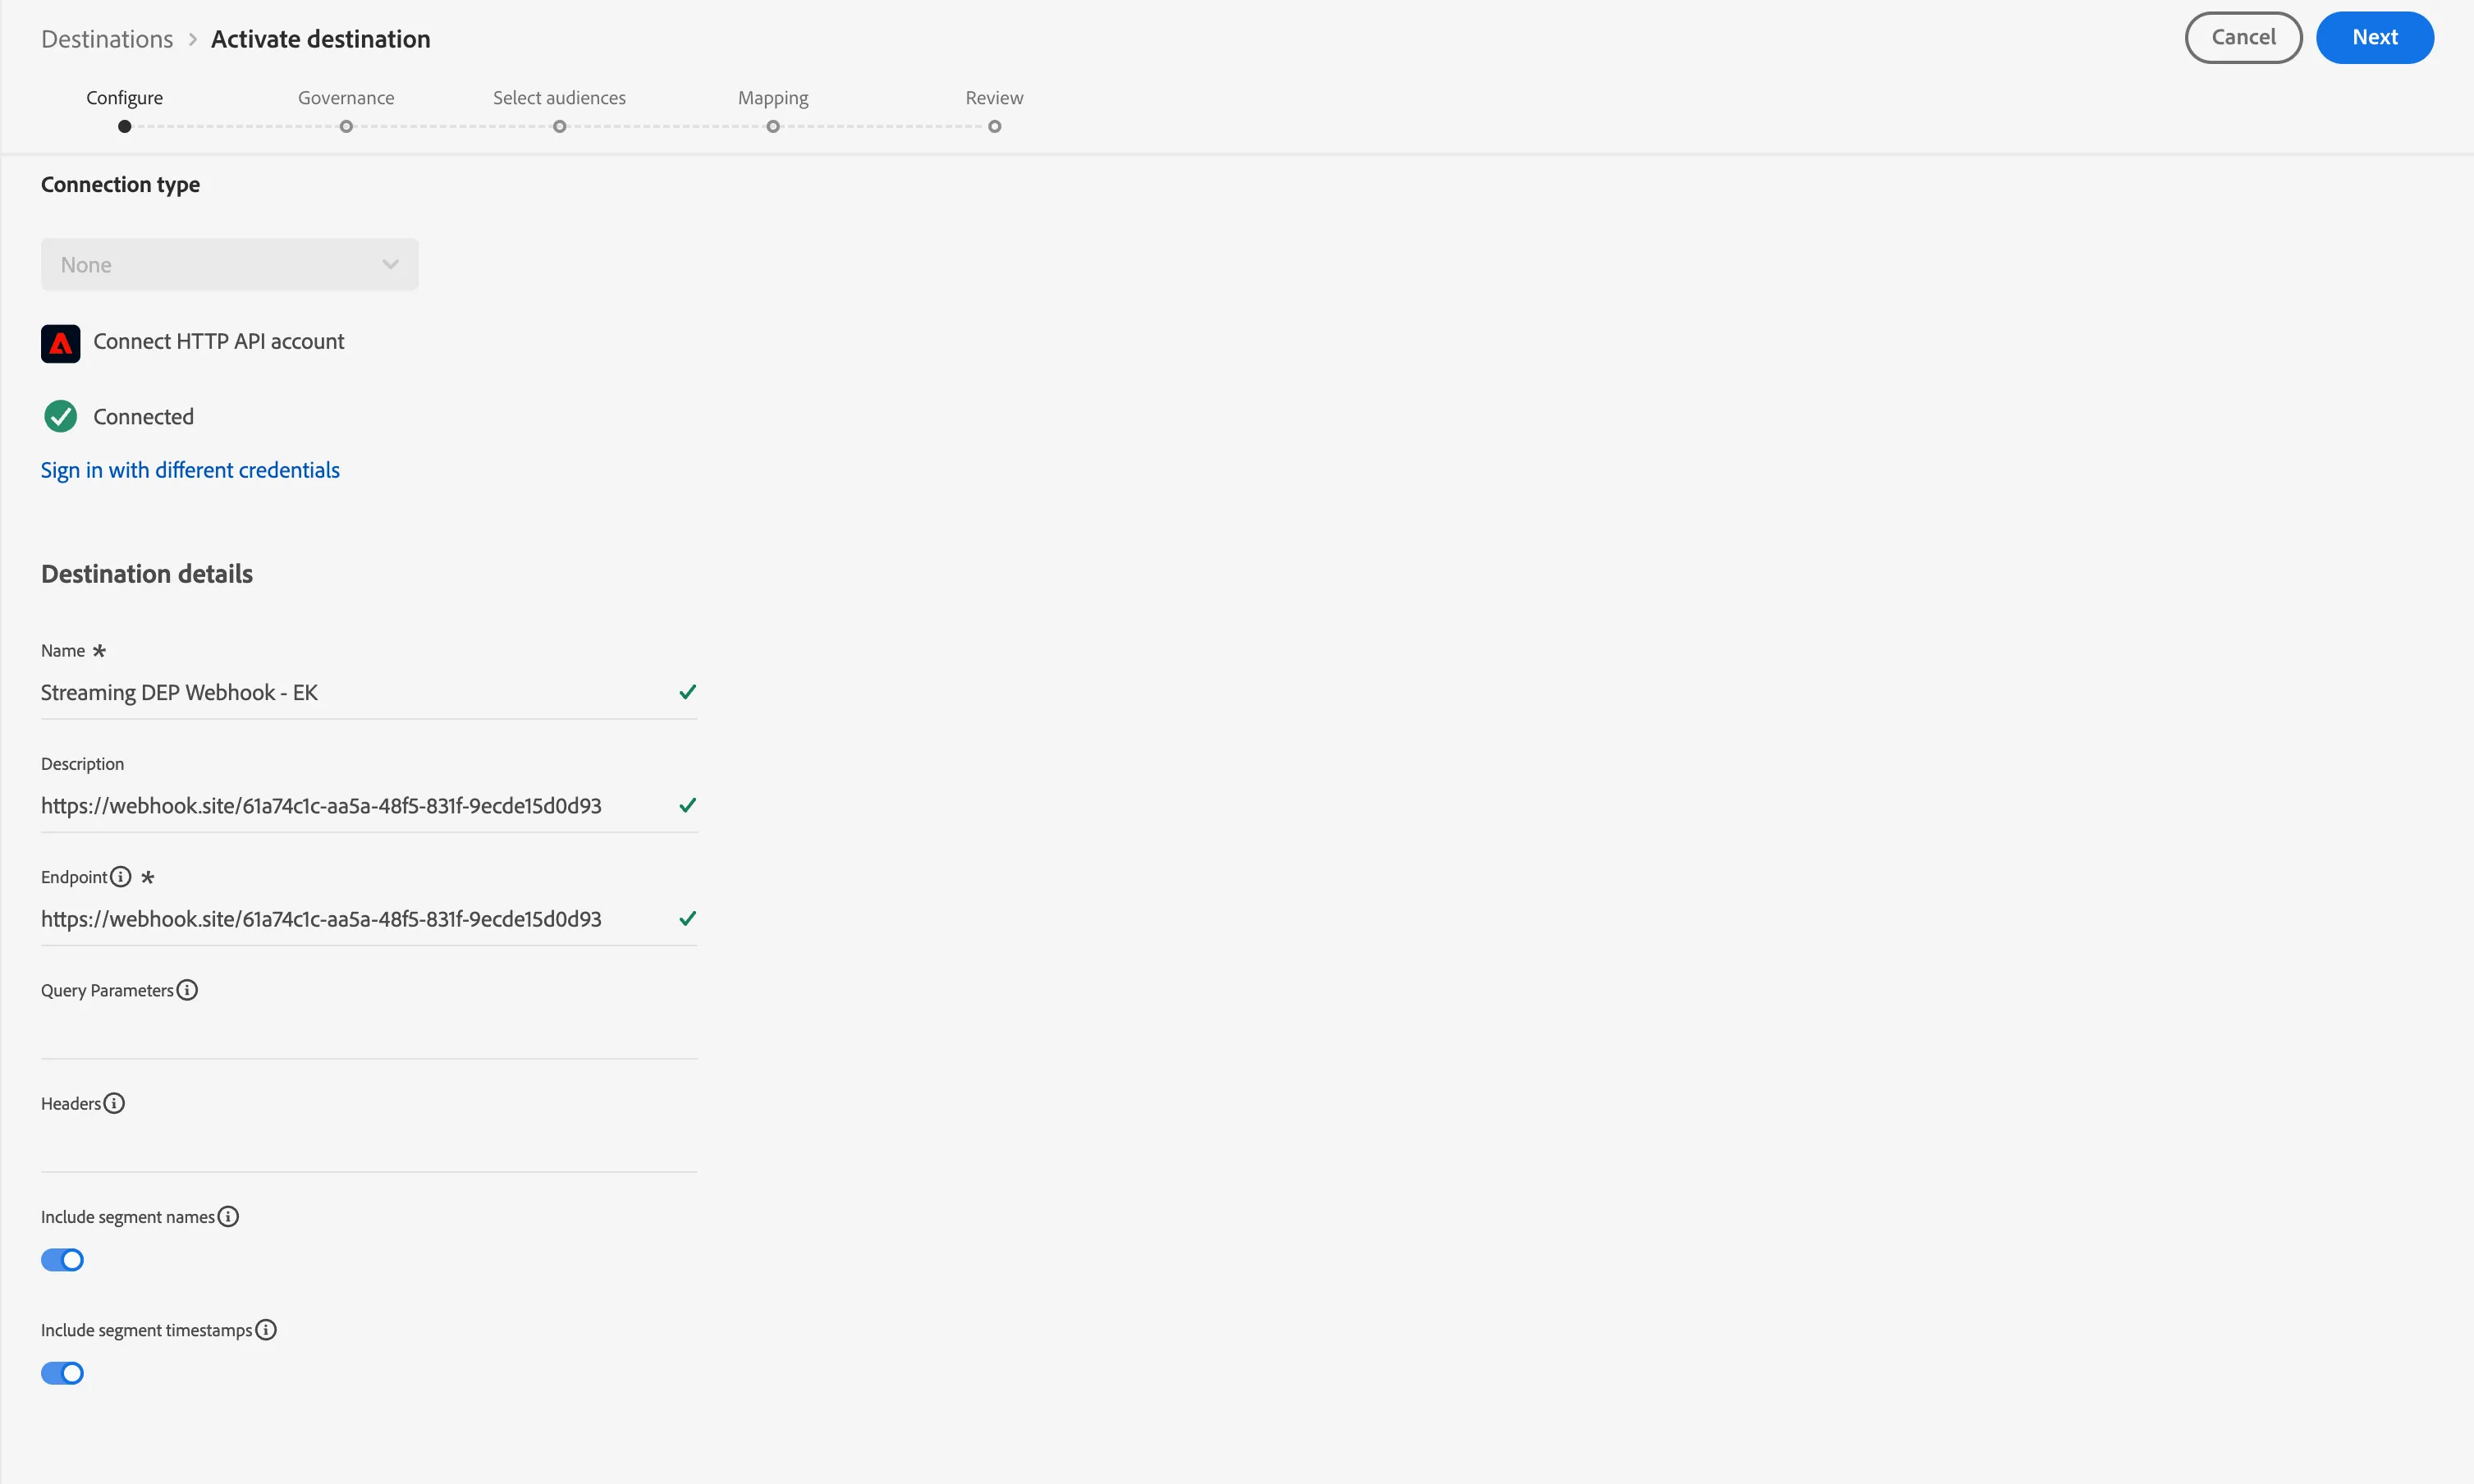
The endpoint, header and query params cannot be changed in the UI once saved
Define Governance
- Select Cross Site Targeting from the Marketing Actions
- When done click the Next button to continue to the next step
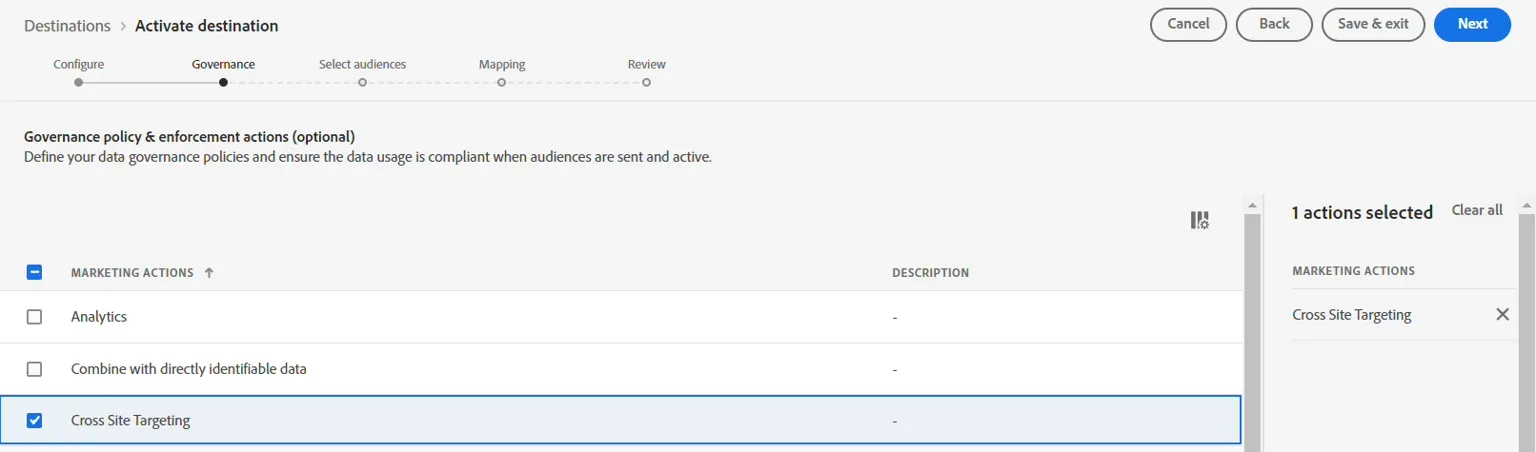
You can learn more about governance policies in Experience League
Select Audiences
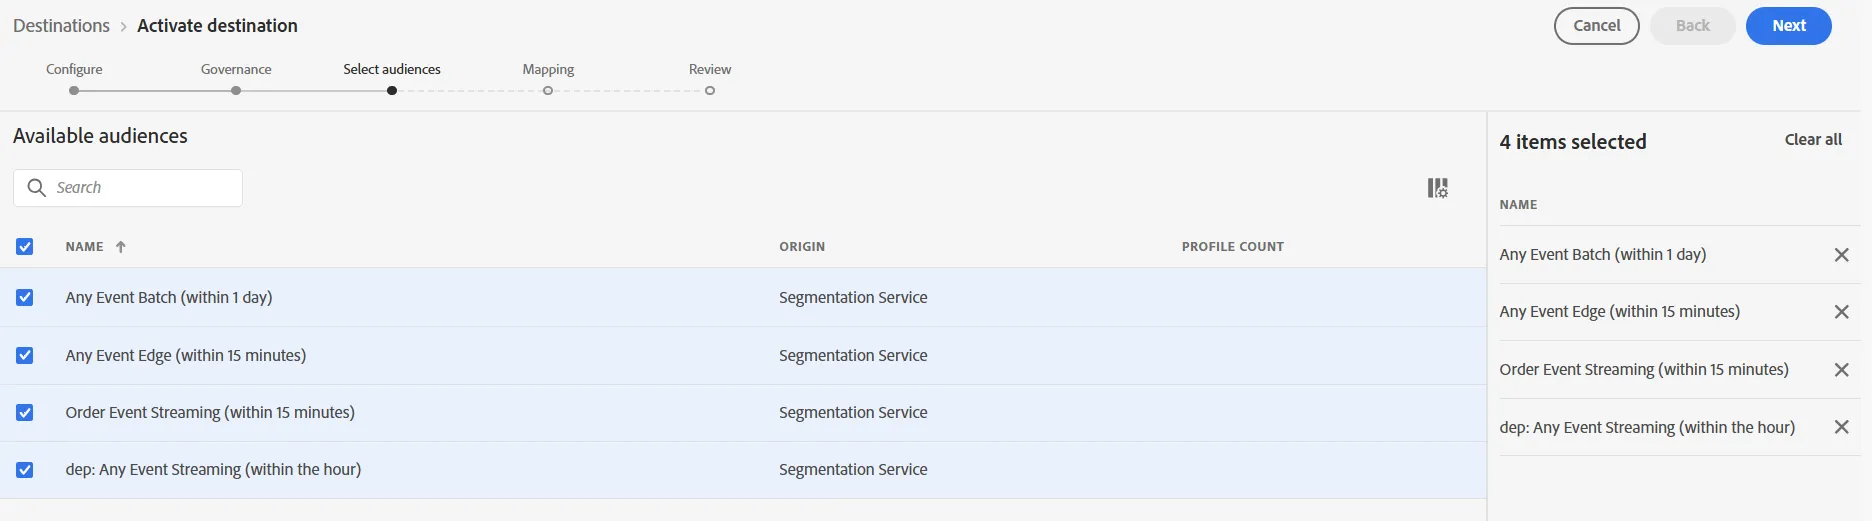
- Select all audiences
- When done click the Next button to continue to the next step
Add Mappings
Here we are adding a field from Profile. If that field has no data, we may see nothing passed to the Destination. Multiple updates over time across Profile and Events sometimes can cause the Destination to trigger multiple times and send multiple payloads.
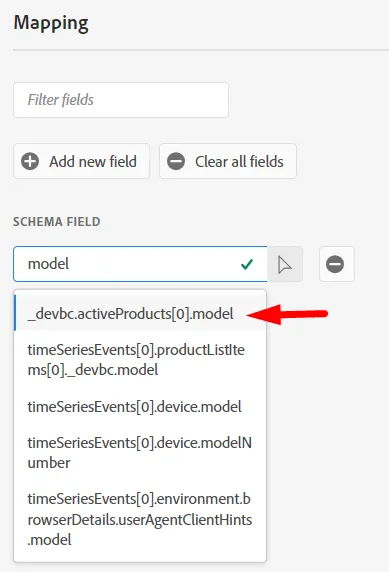
- Click on Add new field to add a field to the schema
- Type model into the schema field input box and select the _depsummit.activeProducts[0].model field from the list of fields that appears
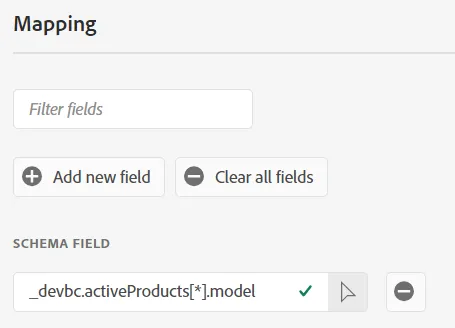
- Change the [0] to [*] in the field name. Your final field should now show as _depsummit.activeProducts[*].model
This is mapping a field on Profile, not Experience Event. Even though we are sending profiles to a Destination based on Audience Qualification, we have to keep in mind what is happening.
- An event comes in
- Audience qualifies the Profile based on rules
- Qualification is stored on the Profile
- The Destination is notified the Profile has qualified
- The Destination sends the Profile What this means is when Destination goes to send the Profile it no longer has awareness of the Event that triggered the Audience evaluation.
Review Step
Validate your final destination looks good and then click the Finish button
You will have multiple audiences, the screenshot below just has one.
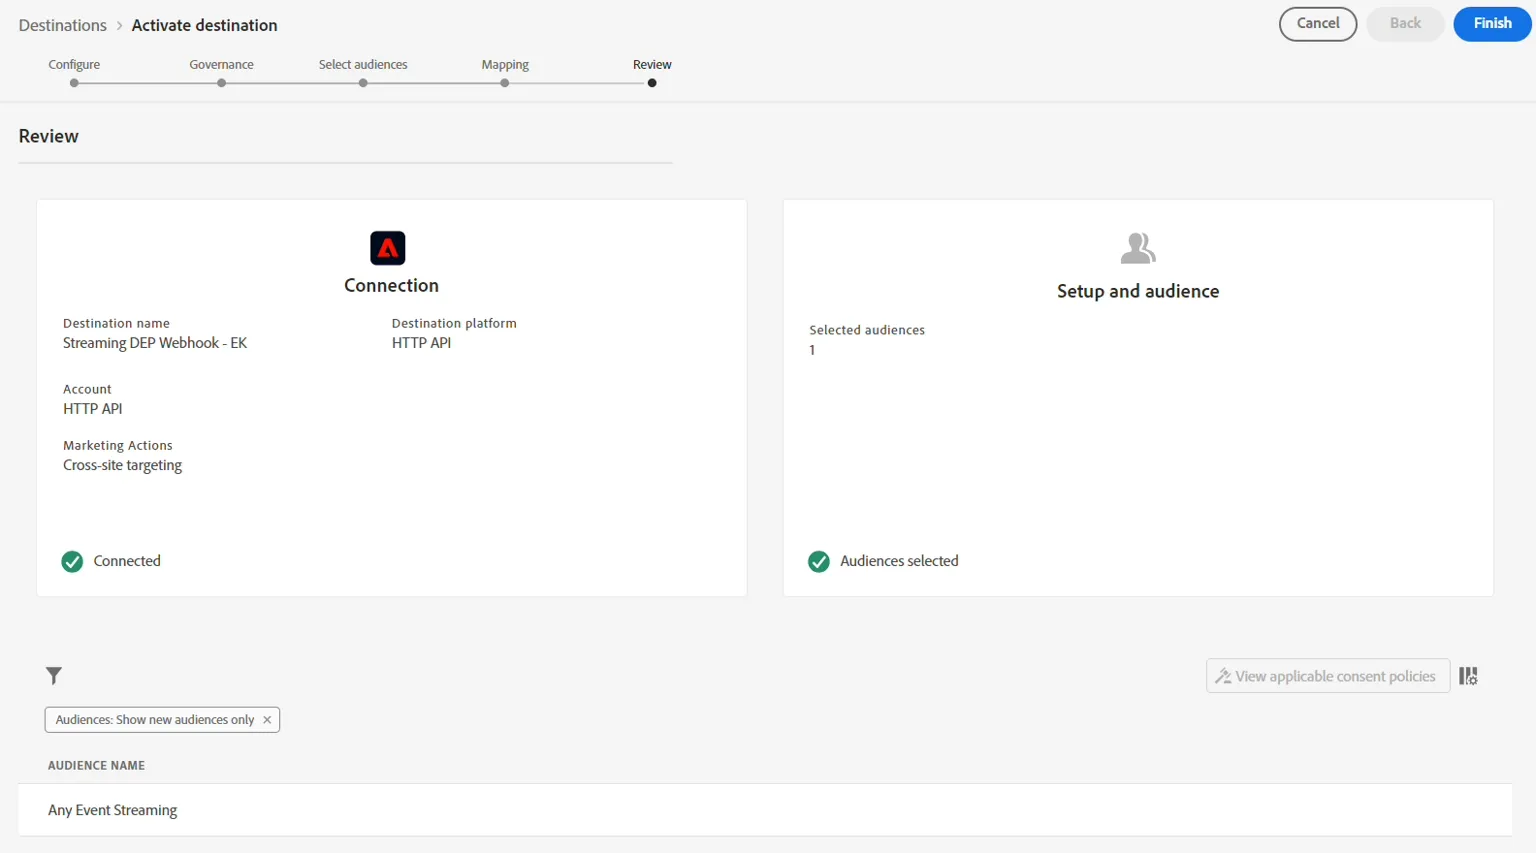
The destination is now configured and waiting for audience qualifications from all the audiences added based on their evaluation speeds:
- Edge
- Stream
- Batch
When initially setting up a Destination the following are important to remember:
- It takes up to 2hrs for any backfill (existing qualified profile) to start activating
- It takes up to 20mins for a newly added audience to start activating